
The HyperView Window is used to display Documents Files (also referred to as background documents) collected and maintained by HyperDoc. You can display several Documents Files simultaneously in several HyperView Windows. The HyperView Window supports displaying scanned images, vector drawings and MS Office documents. The HyperView Window adds two additional vector drawings that are automatically placed on top of the background documents. These drawings are referred to as foreground drawings. The first vector drawing called ObjectOverlay supports Hyper Navigation. It contains vector entities (called spots) that facilitate navigating between documents in an easy way. All versions of the Document File share single ObjectOverlay drawing. The second vector drawing called Redlining supports graphical comments to the Document File. HyperDoc creates separate Redlining drawings for each version of the Document File. Foreground drawings are not supported together with MS Office documents displayed in the HyperView Window. HyperView Window commands, which edit foreground drawings, apply to the current foreground drawing. You can set current foreground drawing using pop-up menu activated by right mouse click. HyperDoc maintains some other vector drawings separately for dedicated purposes, like symbol libraries and printing templates.
HyperView Window is based on Tessel Systems composite document viewer. It allows collecting an arbitrary number of raster documents, and, optionally, vector drawings as well, into one composite document. Individual drawings, subdocuments in the composite document, can be selected for changing their attributes, their position in the common world coordinates and their visible areas (viewports).
Most of HyperView Window concepts concerning documents maintained in HyperDoc's native file formats are common to the whole family of Tessel Systems products.
It means that you can work with such documents in all Tessel Systems applications using the same common tools, actions and procedures while viewing, zooming and printing them. You can inspect – and edit when appropriate – properties of these documents and properties of individual vector entities in vector drawings, using the same common format of tabbed dialogs. You can define, modify and work with vector entities using the same or very similar user interface elements – pop-up menu items, toolbars’ buttons, mouse and keyboard actions – that you are familiar with after sample sessions performed in other Tessel Systems applications.
Since Tessel Systems’ SuperEdit is a primary editor for raster and vector drawings as well as for composite documents, you are referred to SuperEdit User Manual for detailed description regarding these common concepts in general as well as concerned with most of specific commands, tools and actions in detail. Description of common utilities and modules – like Template Editor and Geographical Mappings – see the section called “Geographical Mapping Systems”. Only those concepts and actions that are specific to the HyperDoc’s environment will be described in this manual.
There are some general differences in naming conventions between HyperDoc and SuperEdit. The term “HyperView Window” in HyperDoc is analogous to “Drawing Window” in SuperEdit. Most of the buttons from various HyperViewer toolbars can be found on the SuperEdit’s Vector Toolbar. Other differences will be explained in due course.
The HyperView Window can display single scanned images or vector drawings as well as composite documents that refer to document files saved in various raster and vector formats. Other documents, e.g. plain text files or text documents, spreadsheets and other may be displayed on demand by appropriate application.
Scanned images may be originated from various sources. Usually those would be maps, plans, technical drawings or even text documents scanned on scanning devices. Others may be obtained from fax or made by drawing applications (e.g. Paintbrush or similar ones) that produce drawings in pixel format. All these drawings - including multi-page drawings - may be displayed in the HyperView Window.
The HyperView Window supports displaying vector drawings in DWG and DXF formats.
Vector drawings stored in the proprietary Tessel Vector Document (TVD) format may be also used.
Composite documents are stored in files with the TCD (Tessel Composite Document) extension and can also be embedded in other documents. In the current implementation composite documents contain references to document files but do not contain document files themselves. Composite documents are especially useful in GIS applications for seamless display of neighboring or overlapping sections of raster and vector maps. They are also useful in engineering applications, whenever multiple scanned drawings need to be integrated into a single larger document, different drawing versions compared, or raster images presented together with vector drawings in a controlled way. The HyperView Window supports Single Drawing Mode that facilitates working with a single raster or vector drawing without creating trivial composite documents that refer to one file only.
To facilitate efficient work with background drawings and enhance system capabilities, the HyperView Window adds additional vector drawings that are automatically placed on top of the background documents and maintained separately for dedicated purposes. These drawings are referred to as foreground drawings. HyperDoc creates two active drawings that are overlaid with every document: Redlining Drawing and ObjectOverlay Drawing.
You are referred to the SuperEdit’s User Manual for general concepts concerned with vector drawings and detailed description of vector entities as well as vector editing actions. HyperDoc-specific features regarding vector drawings are described in this chapter.
Each user working with a drawing has his name declared and connected with it. HyperDoc assigns a priority level to the user, so he is treated as a system user or a normal one.
Each drawing layer may have a name prefixed with user name separated by dot character. Drawing layers with no prefix are regarded as system layers and are owned by system user, independently of his name. Drawing layers with specific user name prefix are regarded as normal layers and are owned by their respective users.
Each user has full access rights to layers owned by him. Access rights between different users are determined by access schema properties. The level of access rights may be determined as follows:
the layer may be renamed or removed (full access rights)
the entities placed on given layer may edited, added or deleted (edit access rights)
the layer with its entities is displayed and listed (read access rights)
the layer with its entities is neither displayed nor listed at all (no access rights).
When ObjectOverlay and Redlining vector (TVD) files are created for a native (raster, vector or TCD) file, they get the same units as that file,
unless there is the NewVectorUnits parameter set to a valid unit code in the [General] section of the HDoc.INI file,
in which case indicated units are used when the two mentioned s files are created.
Here is a list of possible values of the NewVectorUnits parameter: 1-inch, 2-foot, 3-yard, 4-mile, 5-millimeter, 6-centimeter, 7-meter, 8-kilometer.
Dynamic texts are implemented using macros stored in text entity. Some macros apply to entities linked to Business Objects. You can use macros defined by HyperDoc for object class or directly define it in the text entity.
When you declare the text entity as dynamic it means that you define a macro name instead of the text content. The actual value of the text is resolved during displaying the text entity according to the actual values supplied by the external database through dynamical links.
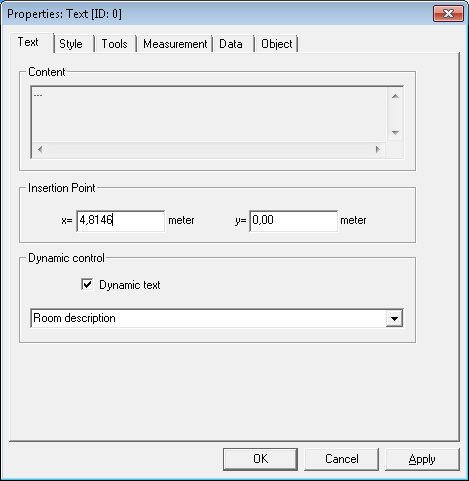
On the Text page of the Text Properties dialog, you may activate the Dynamic Text check box.
This enables the Macro Name combo box, disabling the Content edit box in the same time.
You may choose the macro from the list of names supplied by the external database or type in your own one.
The resolved value of text content is displayed in the Content edit box, if supplied externally; otherwise, the literal name of the macro is used.
On the Object page of the Text Properties dialog, the Object Notification group of checkboxes displays the state of active object notifications that are supported by the entity.
These notifications are used for maintaining such features like dynamically resolved texts and are displayed for informational purposes only.
HyperDoc supports macro definitions for each business object class. A macro definition is an SQL SELECT statement that should return at least one column.
When HyperDoc needs to display a text, it finds the first object linked to the spot and replaces any '%1' in the macro expansion text with actual key value for the linked object.
Then it executes the SELECT statement. The first column of the first row of the query result is used as the actual text to be displayed.
Add configuration table HDocDynamicTextMacros containing macro definitions for appropriate object classes.
ObjectClass | MacroName | MacroExpansion |
Floors | Building name | SELECT Buildings.Building_Name FROM Buildings, Floors WHERE Buildings.Building_ID = Floors.Building_ID AND Floors.Floor_ID = '%1' |
Floors | Floor description | SELECT Floor_Description FROM Floors WHERE Floor_ID = '%1' |
Floors | Floor number | SELECT Floor_Name FROM Floors WHERE Floor_ID = '%1' |
Rooms | Room description | SELECT Room_Description FROM Rooms WHERE Room_ID = '%1' |
Rooms | Room name | SELECT '* ' + Room_Name + ' *' AS RName FROM Rooms WHERE Room_ID = '%1' |
Define name of HDocDynamicTextMacros table in HDocConfiguration table.
Parameter | Value |
SysTableDynamicTextMacros | HdocDynamicTextMacros |
Using the Tools/Options/Text Macros... command, you may define new macros and declare database queries implementing their expansion.
Although you may use any graphical entities as HyperDoc spots, there are some predefined complex entities designed specially for this purpose - they contain a geometrical shape and a text description connected to it.
Polygon spot is a complex entity consisting of a polygon and a text that can be used as a description connected with the polygon. To draw a polygon spot, click the Polygon Spot button on the Overlay toolbar.
Circle spot is a complex entity consisting of a circle and a text that can be used as a description connected with the circle. To draw a circle spot, click the Circle Spot button in the Overlay toolbar.
Define the geometric shape of the spot (polygon or circle) and then enter the text content. The text size is automatically pre-set to fit the whole text inside the polygon or circle nearby its center. The text alignment settings and the border type are predefined but can be changed. From the Components page of the Spot Properties dialog you have access to the properties of the polygon or circle and the text entities separately.
Some entities have tools predefined in a way that makes it easier to perform redlining. They are called redlining entities. The mouse interface and layout of property pages remains the same as in other similar entities.
Annotation is a complex entity consisting of a text and an arrow.
To draw an annotation, click the Annotation button in the Overlay toolbar.
Enter the text content and then define text position with first click and endpoint of an arrow with second click.
The text size is automatically pre-set to a default value. The text alignment settings and the border type are predefined but can be changed.
From the Components page of the Annotation Properties dialog you have access to the properties of the text and arrow entities separately.
Border is defined as a rectangle with tools predefined in the following way: red, solid pen with thickness equal 0 and null brush with transparent mode off.
To draw a border, click the Border button in the Overlay toolbar.
Rectangle Highlight is defined as a rectangle with tools predefined in the following way: null pen and yellow, solid brush with transparent mode on.
To draw a rectangle highlight, click the Rectangle Highlight button in the Overlay toolbar.
Polygon Highlight is defined as a polygon with tools predefined in the following way: null pen and yellow, solid brush with transparent mode on.
To draw a polygon highlight, click the Polygon Highlight button in the Overlay toolbar.
Rectangle Mask is defined as a rectangle with tools predefined in the following way: red, dot pen and white, solid brush with transparent mode off.
To draw a rectangle mask, click the Rectangle Mask button in the Overlay toolbar.
Polygon Mask is defined as a polygon with tools predefined in the following way: red, dot pen and white, solid brush with transparent mode off.
To draw a polygon mask, click the Polygon Mask button in the Overlay toolbar.
Stamp is a text entity with predefined values of content, style and tools, or icon entity with predefined source icon filename. Both types of stamps have a predefined object name. Stamps can be taken from a separate drawing (default file name STAMPS.TVD) that is serves as a symbol library.
To add a text stamp click the Text Stamp button in the Overlay toolbar.
The shape of the drawing cursor changes.
It becomes the same as in the Text command and it is accompanied with a border of the last used text stamp (that is called the current stamp).
Drag it to the place you want.
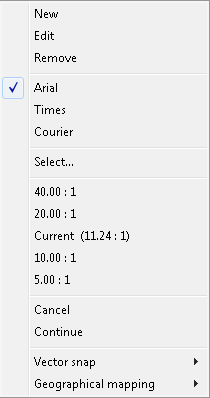
Click right mouse button to invoke a popup menu with the following items:
New - enters the Draw Text action that let you define a new stamp; the stamp is automatically added to the library;
Edit - enters the Properties dialog for the current text stamp;
Remove - removes the current text stamp from the library;
Up to three subsequent items consist of object names of three last used text stamps; you can click one that you want to use;
Select - enters the Choose entity dialog that contains list of all text stamps in the library and the Preview window that shows selected texts.
Select a text and click the OK button to choose the selected text as current.
Click Cancel to retain the current text without any changes.
Five subsequent items allow setting a scale of the current stamp based on the original stamp size in the library. Initially there is one item with the current scale set to 1:1.0, two items with shrinking scales set to 1: 2 and 1: 4 and two items with enlarging scales set to 2.0:1 and 4.0:1. If you choose a new current scale from the list, the scope of available scales is moved in the appropriate direction. The popup menu disappears and you can drag the current text border displayed in the new scale. You can use the right mouse click again to continue editing of the text stamp.
Like in many other HyperView Window pop-up menus, there are also three following items at the end:
Cancel - exits the current command;
Continue - resumes the current command;
Geographical mapping - allows selecting geographical mapping used by HyperDoc; see SuperEdit manual for details.
To save space these three items will not be mentioned in following command descriptions even though they appear in respective pop-up menus.
Use the left button click to place the current text stamp in the final position.
If there is no stamp library connected or there are no text entities in the library these operations act as Text command. Texts defined in this way are added to the library as stamps.
To add an icon stamp, click the Icon Stamp button in the Overlay toolbar.
The shape of the drawing cursor changes.
It becomes the same as in the Icon operation and it is accompanied with a border of the last used icon stamp (that is called the current stamp).
Drag it to the place you want.
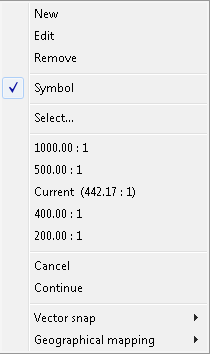
Click right mouse button to invoke a popup menu with the following items:
New - enters the Icon command action, which lets you define a new stamp; the stamp is automatically added to the library;
Edit - enters the Properties dialog for the current icon stamp;
Remove - removes the current icon stamp from library;
Up to three subsequent items consist of object names of three last used icon stamps; you can click one that you want to use;
Select - enters the Choose entity dialog that contains list of all icon stamps in the library and the Preview window that shows selected icons.
Select a stamp and click the OK button to choose the selected stamp as current.
Click Cancel to retain the current stamp without any changes.
Five subsequent items allow setting a scale of the current stamp based on the original stamp size in the library. Initially there is one item with the current scale set to 1:1.0, two items with shrinking scales set to 1: 2 and 1: 4 and two items with enlarging scales set to 2.0:1 and 4.0:1. If you choose a new current scale from the list, the scope of available scales is moved in the appropriate direction. The popup menu disappears and you can drag the current icon border displayed in new scale. You can use the right mouse click again to continue editing of the icon stamp.
Use the left click button to place the current icon stamp in the final position.
If there is no stamp library connected or there are no icon entities in the library these operations act as Icon command.
Icons defined in this way are added to the library as stamps.
To make drawing of adjacent vector elements easier, HyperDoc implements snaps to vector elements.
You may activate them on the Vector Snap toolbar according to their priority as follows: cross snap, snap to insertion point, snap to geometrical center, snap to midpoint, snap to endpoint and snap to nearest point of the entity. You may activate vector snaps as single-click snaps or as permanent snaps, or disable / enable them at once.
After activating vector snap, a blue pickbox is displayed together with drawing cursor. After successful vector snap, a small blue circle is displayed in the snapped position.
You can use grid an orthogonal snap to draw vector entities more precisely.
The Grid settings button on the HyperView View toolbar activates a dialog that allows you to define grid size and visibility.
Grid nodes are displayed as dots, with major grid lines enhanced. If the grid is too dense to display, some of its nodes are omitted.
Snap to grid points is switched on/off by pressing F9 key during any draw command.
Orthogonal snap is switched on/off by pressing F8 key during any draw command.
Printing Template is a special TVD drawing that controls the way the background and foreground documents are printed. A Printing Template drawing is created automatically in Print Preview and Print operations, or it may be prepared in advance independently using the Template Editor utility program.
You can use any vector entities and texts for creating headers, footers and other elements of the desired composition of the printer page layout. Some entities in the Printing Template drawing are predefined:
the white rectangle representing the paper area, with sizes and orientation taken from the current printer settings
the light gray border representing the physical margins
the blue border that defines the active printing area that you can place anywhere within the paper area taking the physical margins into account.
The Print Template command in the Tools/Options menu allows you to define printing template that will be used to print one or more Document Files together with visible foreground drawings and possibly individual drawings.
Symbol Library is a special TVD drawing that is neither accessed nor presented directly, but it is used as a library for maintaining various commonly used entities called stamps.
You can define text or icon stamps, inserting them into the current vector drawing and storing in the same time implicitly into the Symbol Library drawing for future use.
You may easily access and repeatedly insert recently used text or icon stamps into different vector drawings currently edited.
The other objects stored in the Symbol Library drawing are Tool Sets.
These are sets of predefined drawing tools that you may use for various presentation purposes like in the Filtering/Edit Filter/Update command
in the View pull-down menu; they dynamically override the individual tools in selective way in chosen entities so they can be easily distinguished from other entities.
The way the currently selected set of entities is presented is an example of applying an appropriate tool set from the Symbol Library.
HyperDoc uses common text styles and hatch patterns defined in the Symbol Library. Styles and patterns stored in the Symbol Library will be transferred automatically while creating new foreground vector drawings in HyperDoc, so they will be available in new HyperDoc documents only. You can create new styles and patterns in the Symbol Library drawing using SuperEdit.
HyperDoc automatically loads vector drawing STAMPS.TVD as a symbol library
(pointed to by LibVectDrwName parameter defined in the HDocParams table or from the Main Directory when this parameter is missing).
You can communicate with the HyperView Window through various elements of the user interface described below.
In standard HyperDoc installation there are six toolbars dedicated for working with HyperView Window.
The toolbars are: HyperViewer View, HyperViewer Print, HyperViewer Edit, HyperViewer Drawing,
Vector Snap and Multipage Support.
You may see a short description of each button by placing the mouse cursor over it. You may activate the toolbar buttons using the left mouse button click. Activating some buttons causes the HyperView Window to enter some special states that are indicated by showing those buttons pressed while the action is in progress.
HyperViewer View toolbar contains several groups of buttons as follows:
Zoom buttons- for controlling the viewing scale and position of documents displayed in the HyperView Window,Foreground drawing buttons- for controlling visibility of ObjectOverlay and Redlining,Copy View button,Document buttons- for controlling the general background document properties accompanied byRegenerate,World-size cursor settingsandViews Managerbuttons,Option buttons- for setting world-size cursor and grid options.
HyperViewer Print toolbar contains several groups of buttons as follows:
Print buttons- for controlling the page layout, printed area, printer setup and executing print.
HyperViewer Edit toolbar contains several groups of buttons as follows:
Editing buttons- for accessing common editing actions regarding vector drawing entities and controlling their properties.
HyperViewer Drawing toolbar contains several groups of buttons as follows:
Entity buttons- for creating basic geometrical entities in current vector drawing,Spot buttons- for creating special complex labeled entities used as linking spots,Redlining buttons- for creating special entities useful for redlining purposes,Stamp buttons- for creating and re-using text and icon stamps stored inSymbol Library.
Vector Snap toolbar contains several groups of buttons as follows:
Vector snap buttons- for switching on/off vector snap and configuring snap modes
Multipage Support toolbar contains several groups of buttons as follows:
Page navigation buttons- for navigation between pages in a multi-page documentPrint button- for printing all pages of the multi-page document
You are referred to the SuperEdit’s User Manual for detailed description of the buttons. In SuperEdit, they are placed either on the Standard Toolbar or on the Vector Toolbar. Redlining buttons, Stamp buttons and multi-page buttons are specific to HyperDoc only.
All commands accessible through HyperViewer toolbars are also available in the main Drawing menu. In addition this menu contains less frequently used commands - transforming vector entities, handling complexes and blocks, importing/exporting entities and managing geographical mappings.
You can define and perform geometrically oriented actions - most common ones in the HyperView Window - through the standard mouse interface consistent with the contemporary Windows application style. Use the left mouse button for pointing, clicking and dragging in various contexts. Use the right button click to display a pop-up menu with context-dependent contents.
You are referred to the SuperEdit’s User Manual for detailed description of the mouse actions. Some of the HyperView specific features will be explained below.
In the normal state of the HyperView Window use the left click for choosing vector entities in the current vector drawing. The current entity is presented in selected state, i.e. using selected tools (defined in the Symbol Library) or optionally with small square-shaped grips displayed in some control points of the entity.
You may double-click the left mouse button over the spot entities from the ObjectOverlay drawing to switch to the documents or objects connected to the spot.
HyperDoc supports displaying, cursor which size is constant in world coordinates. The World-size cursor settings button on the toolbar activates the cursor configuration dialog. You can define cursor size and switch it on or off. World-size cursor is not available in the print preview mode.
Selection set or simply selection consists of any number of selected entities. If there is no entity selected, the selection set is empty.
The selection set is displayed using special selected tool set defined in the Symbol Library.
You may change the way the selection set is displayed using Tools/Options/Selection/Define Attributes... function from the HyperDoc menu.
The Tool Set: Selected dialog is displayed.
If you define some parameters for the selected tool set, they will be used instead of the original ones defined in selected entities, thus exposing them from the whole drawing.
Optionally, small square-shaped grips are displayed in some control points of the selected entities.
If the editing state is active, the grips are red, which means that you may drag them, thus redefining the shape and geometry of the selected entity; otherwise they are gray or they are not displayed at all, depending on chosen option.
Specific actions can be accessed through pop-up menu that is displayed after right mouse button click. Some actions are common to various contexts, while the other ones are specific to certain states of the HyperViewer Window. They will be described later. Generally, the content of a pop-up menu depends on the state of selection.
In the case of an empty selection (no entity is selected), a pop-up menu that is displayed after a right mouse button click consists of the several group of options.
First group of options corresponds to the ObjectOverlay commands and is described separately.
You are referred to the SuperEdit’s User Manual for detailed description of the remaining options. These options are concerned with current vector drawing, which may be the ObjectOverlay Drawing or the Redlining Drawing.
In the case of both single and multiple entity selection, a pop-up menu that is displayed after a right mouse button click consists of the same options.
The first group of options is concerned with the ObjectOverlay commands and is described separately.
You are referred to the SuperEdit’s User Manual for detailed description of the remaining options. These options are concerned with current selection set in current vector drawing, which may be the ObjectOverlay Drawing or the Redlining Drawing.
To avoid unwanted modifications of selected entities by accidental dragging, HyperDoc normally displays selection in so called inactive state.
To start dragging selected entity, use the Editing enabled command from the Drawing menu.
After activating this option, the grips color is changed to the red, thus showing that the editing state is active.
You can perform some more detailed actions using dialogs. There are simple single-form dialogs, as well as tabbed dialogs describing various contexts of the subject they serve.
The Properties dialogs are implemented as tabbed dialogs. Use the OK button to apply all changes made in the dialog and to close it.
Use the Cancel button to discard all changes made in the dialog and to close it. Use the Apply button to apply all changes made in the dialog and to keep the dialog open.
In the last case the OK button is replaced by the Close button (it can be used to close the dialog) and the Cancel and Apply buttons become disabled.
Any subsequent change made in the dialog enables the Apply button again.
All document files imported to HyperDoc are stored in read-only mode. You can examine file properties but you can't modify them. However it is possible to change subdocuments order or visibility status on the TCD contents dialog. It may be useful while printing TCD document. Above changes are temporary. You have to export document file in order to edit its contents or parameters.
The status bar displays explanations, hints, status and progress information concerned with the currently performed actions. The current cursor coordinates are displayed on the right part of the status bar.
With Geographical Mapping active, geographical coordinates are displayed in the status bar. They can be displayed either in plain decimal form - degrees with 5-digit fractional precision or in DMS form - degrees, minutes and seconds.
ObjectOverlay commands refer to selected vector object in the ObjectOverlay Drawing. They are available only when exactly one vector object in this drawing is selected. They are available in the Spot pull-down menu and in the vector object pop-up menu.
pop-up menu, which is activated by double clicking in HyperView Window when no vector object is selected, allows selecting which of two foreground drawings you want to work with: ObjectOverlay or Redlining. ObjectOverlay commands are available only when you work with ObjectOverlay drawing.
You can create vector objects in both foreground drawings using commands available through buttons in the Overlay Toolbar.
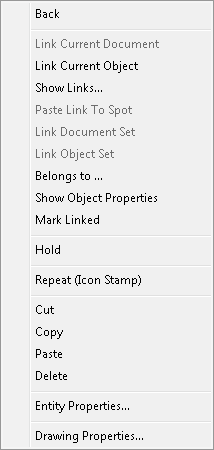
Any vector object in ObjectOverlay drawing can be linked to one or more business objects and / or documents. This can be done in many ways: linking current object/document, linking object/document set or pasting a link. Commands, which can be used to achieve this, are described below. You can move existing link with cut or copy link operation available in the pop-up menu activated by double clicking in one of the Show Links form grids (described below).
The Link Current Document command connects the current document to the selected spot except for the situation when the selected spot is on the current document, in which case the operation is void.
The Link Document Set command connects documents in the current document set to the selected spot. If the document set contains the document that the spot is located on, then this document does not get connected.
The Link Current Object command connects the current navigation hierarchy object to the selected spot.
The Link Object Set command connects all objects in the current object set to the selected spot.
The Activate Link command is executed by double clicking on the spot.
This command's objective is to find either hierarchy object or document that is linked to the spot. If neither objects nor documents are linked to this spot then the operation is void.
First, the command tries to find a linked navigation hierarchy object.
If one of linked objects has the Default attribute, then this object is made current in the hierarchy window.
If no linked object with the Default attribute is found, then the command tries to find linked documents.
One of these documents (the one with the Default attribute or the first one) is made current in the Documents List Window.
One of hierarchy objects this document is connected to (depending on the state of the Auto Target Selection option) is made current in the hierarchy window.
If no documents are linked to the selected spot and no linked object has the default attribute, then the first object from the linked object list is made current in the Navigation Window.
The Show Links command displays the Spot Links dialog that lists objects and documents linked to the selected spot.
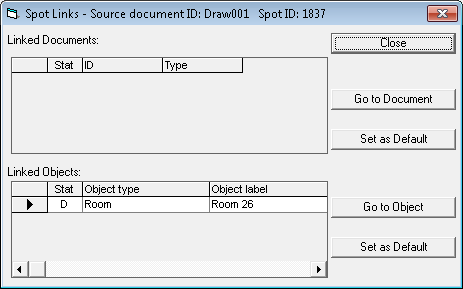
The Set As Default command buttons allow to select object or document that can be made current by the Activate Link action.
The Go to Object and Go to Document command buttons close the Spot Links dialog and make the selected document or object current.
These commands (and more) are also available through the pop-up menus activated by right-mouse-clicking on document or object lists present in the Spot Links dialog. The Linked Documents pop-up menu can have two forms depending on the number of highlighted documents. You may highlight a document in the Documents List Window by left click on the left column of the list.
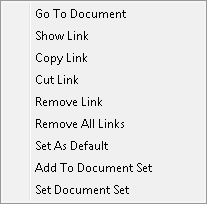
Go to Document
Makes respective document current. One of objects this document is connected to (according to the state of the Auto Target Selection option) is set as current. Closes the Spot Links dialog.
Show Link
Makes respective document current. One of objects this document is connected to (according to the state of the Auto Target Selection option) is set as current. Does not close the Spot Links dialog.
Copy Link
Copies link to the right-clicked document to the clipboard.
Cut Link
Copies link to the right-clicked document to the clipboard. Deletes the link between given spot and given document. Allows moving this document link to another spot or business object.
Remove Link
Deletes the link between respective document and the selected spot.
Remove All Links
Removes all document links to the selected spot.
Set As Default
Sets respective document as default removing the default attribute from other documents and objects linked to this spot.
Add To Document Set
Adds respective document to the current document set. Available only if this document is not in the current document set.
Remove From Document Set
Removes respective document from the current document set. Available only if this document is in the current document set.
Set Document Set
Clears the current document set and adds respective document to the current document set.
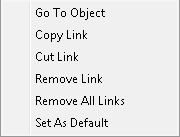
Go to Object
Makes respective object current. Closes Spot Links dialog.
Copy Link
Copies link to the right-clicked object to the clipboard.
Cut Link
Copies link to the right-clicked object to the clipboard. Deletes the link between given spot and given object. Allows moving this object link to another spot or document.
Remove Link
Deletes the link between respective object and the selected spot.
Remove All Links
Removes all object links to the selected spot.
Set As Default
Sets respective object as default removing the Default attribute from other documents and objects linked to this spot.
The Back command allows returning back from a move caused by the Activate Link command - the current object and current document are set as they were before the last Activate Link command.
This undo process can have more steps - on each Activate Link command HyperDoc remembers previous current document and current object.
If you issued the Activate Link command for example 3 times, then you can issue the Back command 3 times as well and return to the state from before the first Activate Link command.
Of course this description applies not only to the Activate Link command only but also to the Go to Object and Go to Document commands -
they can be undone using the Back command as well.
The Unlink Current Object command deletes the link between the selected spot and the current hierarchy object.
Paste Link command examines clipboard for copied object link (e.g. with Copy Object Link command), and if it is in the clipboard, it creates a link between given spot and given object.
Otherwise it examines the clipboard for one or more document links (you can copy multiple document links to the clipboard simultaneously with Copy Document Links command).
These document links are used to connect respective documents to the given spot.
HyperDoc offers an advanced function to print TSL Documents together with visible foreground drawings. You can define a print template (vector drawing) that defines document localization on the paper sheet and may contain a standard border definition. HyperDoc package contains a separate utility called Template Editor for preparing print template drawings. The Template Editor is described in SuperEdit’s User Manual. Template Editor allows you to define a standard frame for printing documents in Portrait and Landscape orientations.
You are referred to the SuperEdit’s User Manual for detailed description of the Print Preview, Define Print Window and Print options. Some newest or HyperDoc specific features available during these actions are described below.
In order to print multiple documents you define an appropriate number of separate Image windows in the print template. Initially print preview displays the current document contents in each Image window. Two commands are available on pop-up menu for each Image window when it is selected.
Set print document- allows you to associate another drawing file with the selected Image window.Paste link- associates contents of HyperDoc document (together with ObjectOverlay and Redlining drawings) with the selected Image window. This option is available only if clipboard contains link to a document created by theCopy Document Linkcommand.
When a multi-page drawing is displayed in HyperViewer Window the Print command prints only the current page of the drawing.
To print all pages of the document use Print all pages command. This command is available on Multipage Support toolbar.
This command is intended for making a printed copy of the multi-page document so it does not use print template even if one is defined for ordinary Print command and automatically fits each document page on the paper page.
HyperDoc can save the printout in HTML format. HTML files created this way can be used to print HyperDoc drawings from an HTML browser.
To save printout in HTML, enter print preview and from the pop-up menu select Publish HTML.
This command is available when no vector object is selected. HyperDoc will ask for HTML file name for preview page.
It will also automatically create additional files containing preview image, full resolution image and pages suitable for printout.
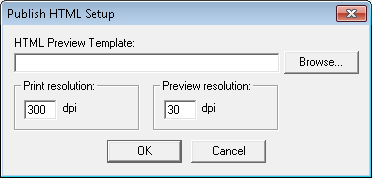
The preview HTML page can be created according to a template. You can enter the template file name and additional parameters in the Tools/Options/Publish HTML Setup command.
The template is an ordinary HTML file, which can be created with any suitable HTML editor. It should contain special codes that will be replaced during execution of the Publish HTML command.
$$PreviewGIF$$ - will be replaced by a file name of the preview image
$$PreviewHTML-96$$ - will be replaced by a file name of the HTML page suitable for printing (when the user uses small screen fonts)
$$PreviewHTML-120$$ - will be replaced by a file name of the HTML page suitable for printing (when the user uses large screen fonts)
For successful printing in HTML check for proper margins.
Right click on document in Print preview window and select Margins setup.
In Margins dialog set margins to 1 cm or more.
Now if you want to print HTML document from your Web Browser, select Print Setup and set margins to the values you set in HyperDoc or a little bit greater.
Printing to HTML works with .
To save printout in a raster file, use the Print to file command available on the HyperViewer Print toolbar. This command saves the printout in resolution set for Publish HTML command. After selecting this command HyperDoc will ask for file name and image format. For some formats (like TIFF) an additional dialog lets the user select compression mode for the output raster file.
The print template may contain special text macros that HyperDoc interprets while printing documents or displaying a print preview. Text macros to be expanded in print template should be entered as dynamic texts. The set of macros resolved in print template is as follows.
$Date | current date in short system format |
$DateLong | current date in long system format |
$Time | current time in short system format |
$TimeLong | current time in long system format |
$User | user logged to HyperDoc |
$Scale | scale actually used for printing |
$NominalScale | nominal drawing scale as defined in TAF |
$DocumentName | name of the document |
$VersionName | name of the current version of the document |
$OriginalFileName | original file name of the document |
$CurrentObject.Field | looks for field |
$CurrentObject.Table.Field | looks for field |
$ContextObject.Field | looks for field |
$ContextObject.Table.Field | looks for field |
Current object is the object that is currently selected in the navigation hierarchy window. Context object is the object that has been used to display this document (the object that is current when the document is initially displayed).
Multiple macros can be specified in a single text. The macros are separated with a semicolon (;). They are evaluated from left to right, the first macro that can be resolved successfully is used for display. Use text in quotes to specify literal text (usually at the last position to be used as the default text when other macros cannot be resolved).
Example:
$Table1.Field1;$Table2.Field2;$ContextObject.$SomeField;"Literal text"
The macros may also be in the following form:
$Table.Field
Such a macro is resolved to the value of the field 'Field' in the table 'Table'.
The table may be one of the document tables or one of the tables from the current hierarchy.
The record is selected using the following criteria:
if the table is one of the document tables then the current document record is used
if the table is one of the object tables then HyperDoc looks for a record in the object table containing a link to the current document
Any SQL SELECT query may also be specified as a macro text with the following macro syntax:
@SELECT ...
All occurrences of the string %1 in the query are replaced with current document ID (surrounded by quotes if necessary). The first column of the first returned record is used as a macro expansion.
You can define your own macros, because HyperDoc can notify an Add-In object or external application about printing action (see HyperDoc Configuration and Integration Manual for details).
The Print Template command from the Tools/Options menu allows you to define print template (vector drawing) that will be used to print Document Files together with visible foreground drawings.
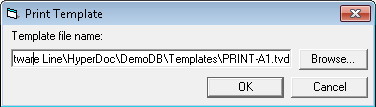
If you don’t define default print template, HyperDoc fits the document to the paper sheet on the current system printer.
Before printing you can see the print preview on the screen. In the Print Preview window you may modify the vector drawing initialized from the print template which is on top of the printed document. You may change document localization on the paper sheet and modify the print window (a document area to print). For each Image window you can select document that will be printed in it.
The Publish HTML Setup… command from the Tools/Options menu allows you to define the HTML template and set resolution for print and preview
images to be used while printing to HTML format.
The following commands allow controlling the HyperViewer Window contents.
When a multi-page raster document is displayed in HyperViewer Window items in the Multipage Support toolbar are available for navigation through such document.
First Page - shows the first page of the document.
Previous Page - shows the previous page of the document.
Next Page - shows the next page of the document.
Last Page - shows the last page of the document.
Current Page / Total Pages - displays current page number and total number of pages in the document.
The Filtering group of commands is available in the View pull-down menu.

Commands of this group allow applying different Tool Sets (see the section called “Symbol libraries”) to spots connected to business objects based on user-defined conditions.
There are two commands in this group: No Filtering and Edit Filter.
No Filtering command disables filtering. Edit Filter command allows to edit a presentation.
These two commands in the Filtering group are accompanied with names of previously created presentations.
Selecting such name from sub-menu makes given presentation active.
Presentation is a named sequence of presentation filters.
Presentation filter is a pair of two entities: a Tool Set and an SQL predicate.
If this predicate evaluates to true in the context of given business object, then the spot connected to this object is displayed with given Tool Set.
When a presentation is active, for each spot to be displayed HyperDoc examines the object connected to it and applies all Tool Sets associated with
all those predicates that evaluate to true in the active presentation.
Sample HyperDoc database contains sample presentation called Room Status,
which allows to display spots connected to objects of class Room with different Tool Sets depending on the value of Room_Status attribute.

When a presentation is active a legend form is shown in a separate window.
The legend form shows label and tool set for each presentation filter, showing how objects matching criteria specified by the filter are highlighted in HyperViewer Window.
Legend is not visible if none of the presentation filters has the Label field defined.
HyperDoc can automatically add legend to the printout. The print template drawing should contain a special rectangle entity, which defines legend location on paper. The special rectangle must have attached user data defined as follows:
Type: Integer
Key: LegendRect
Value: 1
Use Template Editor utility to add the legend rectangle to the print template.
View / Filtering / Edit Filter command launches Presentation Filters dialog, which allows to edit or delete existing presentations and to create new ones.
With New command you can create new presentation.
Using Delete command button in the upper part of Presentation Filters dialog you can delete existing presentation.
With Add command you add presentation filter to selected presentation using Add Presentation Filter dialog.
In this dialog you can select a class of business objects to which this presentation filter will apply.
You can select a drawing tool that will be used for in this presentation filter.
In the Filter field of Add Presentation Filter dialog you enter a condition,
for example in the form like ObjectClass.Field operator literal or in any form supported by the SQL dialect of the database used by HyperDoc.
If in this condition you want to refer to tables other then ObjectClass table of the object class to which this filter will apply, you must specify all table names in the From field separated by commas.
Using Delete command button in the lower part of Presentation Filters dialog you can delete selected presentation filter.
Update button launches Update Presentation Filter dialog similar to Add Presentation Filter dialog.
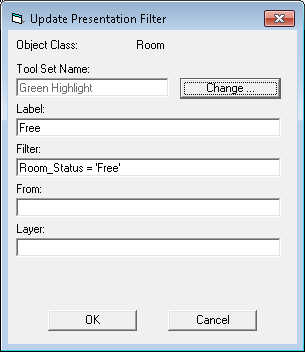
Both these dialogs have Change button, which allows changing Tool Set associated with given presentation filter.
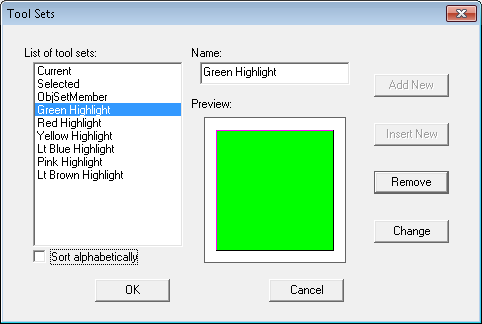
This button launches Tool Sets dialog.
You are referred to the Super Edit documentation for description of this dialog.
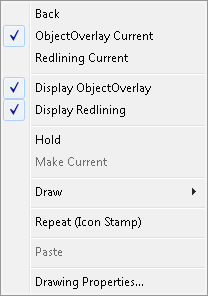
HyperDoc creates two foreground drawings - ObjectOverlay and Redlining - on top of every background document that is shown in the HyperView Window. All commands from HyperViewer Drawing toolbar refer to the current foreground drawing.
The current foreground drawing, ObjectOverlay or Redlining, is checked in the pop-up menu activated in No selection state and in the View menu. You can switch between them by selecting ObjectOverlay Current or Redlining Current from one of these menus. Only visible drawing can be set as current.
Current foreground drawing is used for selecting, hypernavigation and editing.
ObjectOverlay and Redlining drawings can be set visible or hidden independently.
You can do this from the View menu by checking Display ObjectOverlay and Display Redlining options.
These options are also available on HyperViewer View toolbar and in the pop-up menu in No selection state.
HyperDoc can display many documents simultaneously in separate windows.
One of windows displayed in the HyperView Window is called Current Navigation Window (it is shown in window title bar).
HyperDoc uses Current Navigation Window to display content of the current document from the Documents List Window.
If you move to a new current document in Documents List Window, HyperDoc closes the previous document displayed in Current Navigation Window and displays the new current document.
The Hold On command (available from pop-up menu in No selection state and the View menu) allows you to keep document contents displayed even if current document in the Documents List Window has changed.
HyperDoc creates a new Current Navigation Window for new current document if actual Current Navigation Window is in the Hold On state.
The Hold Off command switches off the Hold On state for the current window.
The Make Current command (available from pop-up menu in No selection state and the View menu for windows that are not Current)
sets the window as Current Navigation Window.
The Close All command closes all open document windows (except the Current Navigation Window). It is particularly useful when many documents are simultaneously open in one session.
When more than one document window is open, the Cascade command arranges open document windows in the HyperView Window in such a way,
that they overlap and form a kind of stack but each is shifted a little, so that their title bars are visible.
The current document window remains active and is put on the top of the stack of document windows.
When just one document is open, its window is expanded to fill the entire HyperView Window.
When more than one document window is open, the Tile Horizontally command divides the whole HyperView Window between all equally sized document windows.
When just one document is open, its window is expanded to fill the entire HyperView Window
As a result of this command, open document windows are arranged in such a way, that each is visible and does not overlap with any of the other windows and the neighboring windows have common horizontal borders.
When more than one document window is open, the Tile Vertically command divides the whole HyperView Window between all equally sized document windows.
When just one document is open, its window is expanded to fill the entire HyperView Window.
As a result of this command, open document windows are arranged in such a way, that each is visible and does not overlap with any of the other windows and the neighboring windows have common vertical borders.
Every document window can be minimized to a form of an icon labeled with a document name. The names of minimized windows (documents) remain present on the list of open documents in the Window menu.
Document icons can be dragged with the mouse one by one to a new place.
The Arrange Icons command changes the placement of those icons. It puts them in a row(s) at the bottom of the HyperView Window.
When you double click with a mouse on a document icon or click on a document name in the list in the Window menu, the selected document window opens again at the previous place and size.
The Arrange Icons command does not move open windows, so they may overlap the area, where document icons are placed.
In such a situation you can uncover the icons by resizing the windows manually or with the Cascade command.
The AutoShow command allows you to control displaying document content while navigating through the document list.
If the AutoShow command is checked HyperDoc displays content of the current document from the
Documents List Window in the Current Navigation Window or activates appropriate application to display documents in foreign formats.
Otherwise HyperDoc displays the current document content only after the Show command is issued from the Document pull-down menu.
The HyperView Window uses a fixed palette of 256 colors that often do not match palettes of raster images.
This may lead to incorrect display of color raster backgrounds.
If the Force image palette option is checked HyperDoc displays raster images using their own palette giving the best possible result on the screen.
Unfortunately the vectors may be now displayed in wrong colors (due to a different palette in the vector drawing), so the option gives you a choice.
The option does not affect printing, which is done using original colors for both raster and vectors.
