
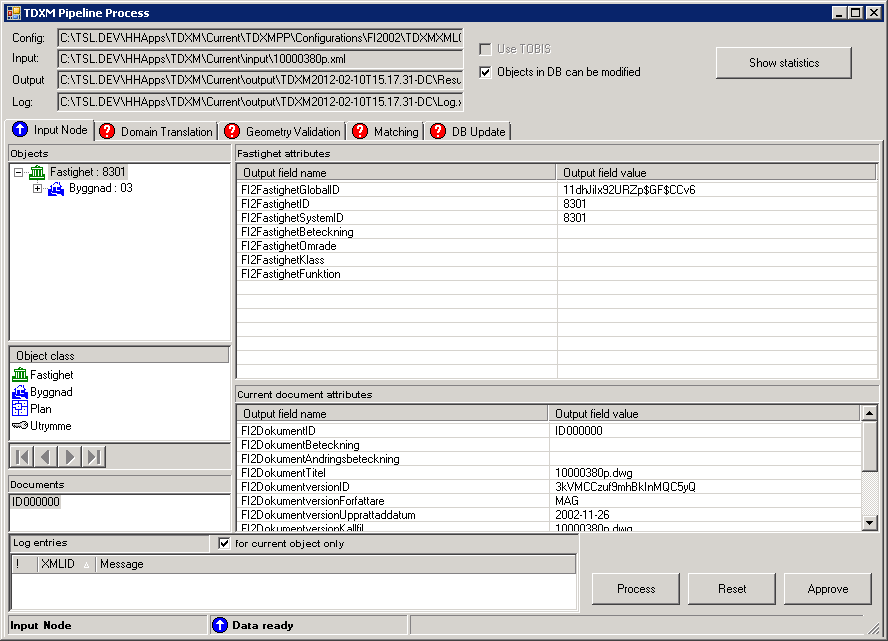
TDXM Pipeline Process main user interface displays input pipeline information section and tabs for all/selected (depends on configuration) TDXM processing nodes. Input pipeline information consists of four read only fields:
Config – configuration file path name,
Input – input file path name,
Output - output file path name,
Log – log file path name.
Below information section there are tabs for these TDXM nodes, for which configuration file contains UIConfig section within processing node section (see TDXM PP configuration file). UIConfig section has several attributes:
ID – node identity number,
Caption – node tab caption,
Assembly – .NET assembly name,
Class – .NET class name which serves user interface for this node.

Node user interface, placed on node tab, shows imported XML file processed by this node. At the bottom of the form are list of logging messages and three buttons:
Process button – reply processing of the node
Reset button – reset node
Approve button - approves changes made to the imported XML file and starts process in the next node.
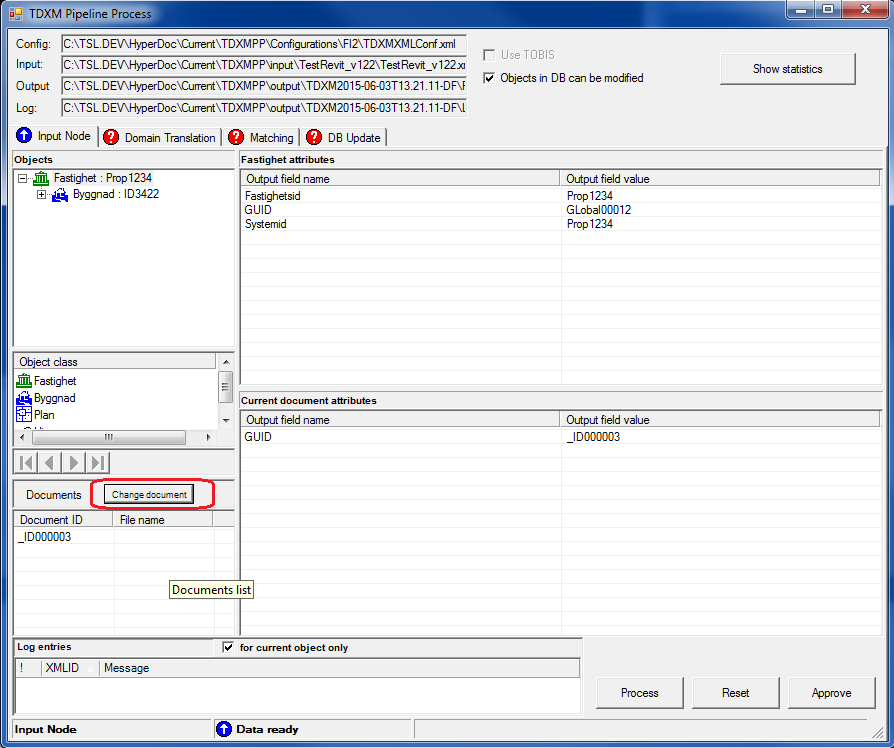
To change document you have to RMB click on the document in the list and choose option Change document.
Only input node and domains node use generic user interface to show processing results to the user. Most TDXM processing nodes can display their own special UI, described in the next sections. To use generic user interface for a processing node there have to be UIConfig section placed within processing node section of the configuration file. Following attribute values have to be set (ID and Caption depends on node):
<UIConfig ID="node UI id" Caption="tab caption" Assembly="TDXMUI" Class="Tessel.TDXM.UI4Node">
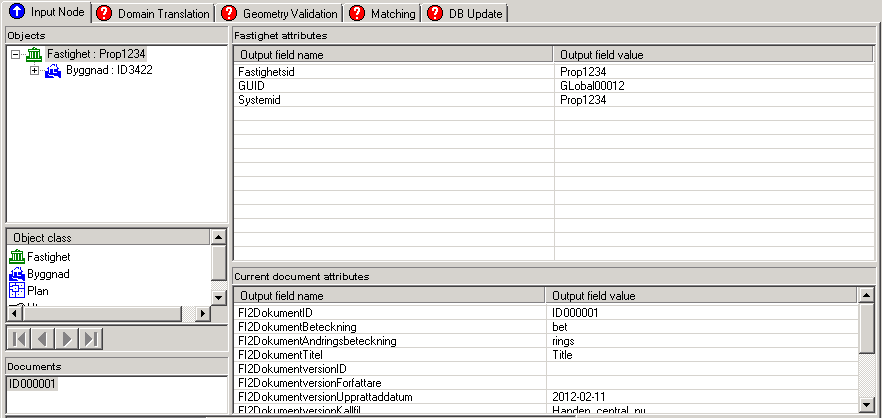
Generic user interface is divided into two parts: objects tree on the left side of the splitter and object attributes grid on the right. Objects tree displays object hierarchy from imported XML. It can also display object status as an icon before object label. Object statuses are defined in a Filters section inside the UIConfig section:
<Filters ColumnName="TOBIS Status">
  <Filter name="status name" expr="status XPath" icon="icon file" >
  [...]
</Filters>
If the filters section exists, the status legend is displayed below object hierarchy. ColumnName attribute contains the legend name. Filters section contains several Filter sections, one for each status. Filter section attributes should be as follow:
name – status name displaying on the status legend,
expr – expression in the XPath language, applying to the HObject section of the imported XML, defining object status,
icon – status icon file name.
The status legend contains status list with status icon and status name for each status, defined in the configuration file. Clicking one status legend row activates status toolbar buttons, but only if there are objects with this status. The first object with selected status becomes the current object. Status toolbar buttons are self-descriptive: Find first, Find previous, Find next. Find last. Toolbar is not active, when no status legend row is selected or when there is no object with selected status in the tree.
Object attributes grid can display configurable number of columns: 2 to 4, default value is 4. Displayed object tree is also configurable: input node XML or output (processed) node XML. To configure object attributes grid the operator should place ExtraUIParams section in UIConfig section:
<ExtraUIParams>
  <Param Name="ColumnNumber" Value="2"/>
  <Param Name="ShownXML" Value="Out"/>
</ExtraUIParams>
Section Param contains names and values for user interface additional parameters. Parameter ColumnNumber sets the grid column number (2 to 4). Parameter ShownXML sets, which processing node XML, input (Value="Inp"), output (Value="Out") or merged both (Value="Both"), will be shown in the object hierarchy tree.
Validation process is realized according to configuration settings in two modes: automatic and manual.
The first one is invoked and completed automatically (from this it’s name come from) after previous step of processing (e.g. Domains Translation) is approved.
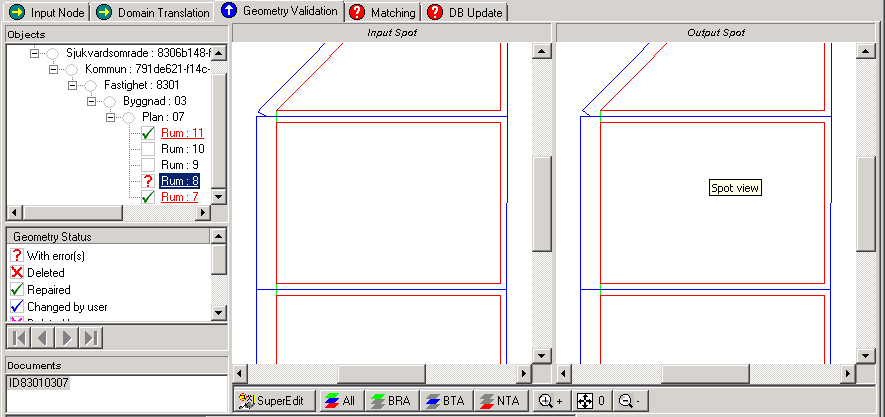
So you can examine validation results (as far as batch mode is concerned) at once in TDXM Pipeline Process window with Geometry Validation tab active.
In a tree control the spaces hierarchy is displayed.
Click in a plus sign in subsequent nodes to see all hierarchy.
Nodes are coloured according to content of Legend control that is placed below.
Colors and descriptions used in legend are defined in UIConfig subsection in TDXMXMLConf.xml configuration file.
Notice that colourless nodes with OK descriptions means nodes with spots without errors or nodes without spots.
Clicking in coloured tree nodes you can watch spots before and after validation process on the middle and right controls accordingly. To watch spots with a specified error class only select this error class in Legend control and use scroll buttons.
SuperEdit button placed on the lower left corner of the window lets you lunch SuperEdit application and continue the validation process in manual mode. While exiting SuperEdit you can accept (or not) changes made and go back to TDXM Pipeline Process window. Selecting colored nodes and watching displaying spots you can still see results of all changes made so far.
Approve button accepts your validation activity and passes control to the next processing node (e.g. matching node).
Matching node UI consists of three main parts:
tree view part,
object part,
document part.
Two splitters (left vertical splitter and horizontal splitter) separate this main window's parts. Tree view part is just the same like for generic user interface.
The object part is in the upper right part of the tab. It contains its own splitter (the right vertical), object attributes grid and matching controls. For the object selected in the tree the operator can see imported attribute value and HyperDoc attribute value. Imported value can be edited after grid row double clicking. Attribute change can be confirmed by Enter key or skipped by Escape key. The matching node UI shows the result of the automatic matching imported XML with HyperDoc database. The operator can change it by manual matching, using the rightmost controls and buttons. Read from HyperDoc button exports from HyperDoc the current object siblings. The operator can review exported sibling objects in combo box: unmatched only, if checkbox is checked or all objects, if it is unchecked (current object is always showed in combo box). Than the operator can match one sibling using Match button. He can enter also new object key using Match new object button. Both these actions perform full matching process (with new export from HyperDoc) and tree is refreshed to show changed object status. Before matching process starts the operator is asked to confirm or remove all previously made attribute changes. To discard all attribute changes and manual matching the operator can use Restore input state button. It restores state that was after the first automatic matching.
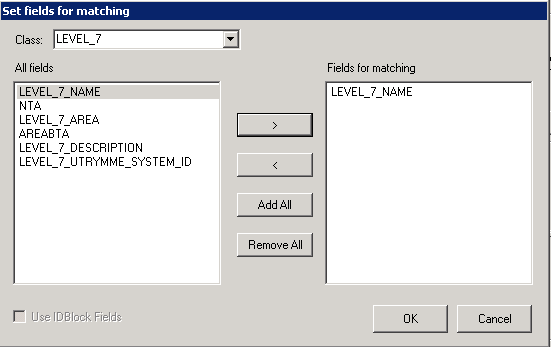
Under Match new object button, there is Fields for matching... button. Operator can set, which fields will be used for matching, when matching by GUID and IDBlocks from TOBIS haven't been successfully.
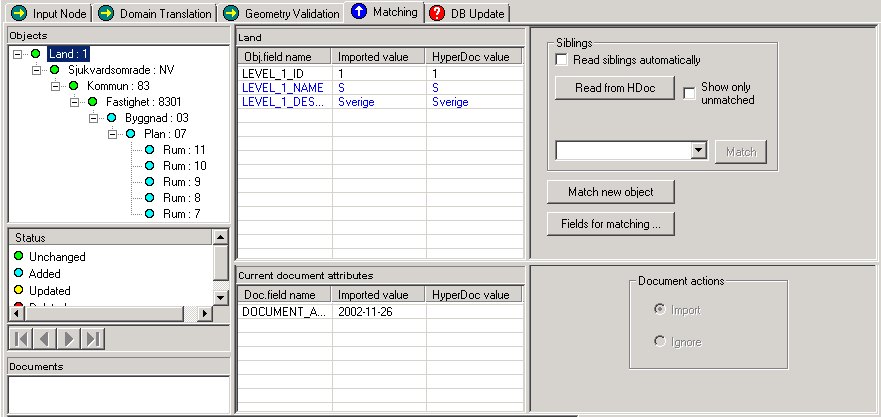
The document part is in the lower right part of the tab. It contains document attributes grid and radio buttons. Document attributes are not editable. The operator can decide, if he wants to import showed document or not and select appropriate radio button.
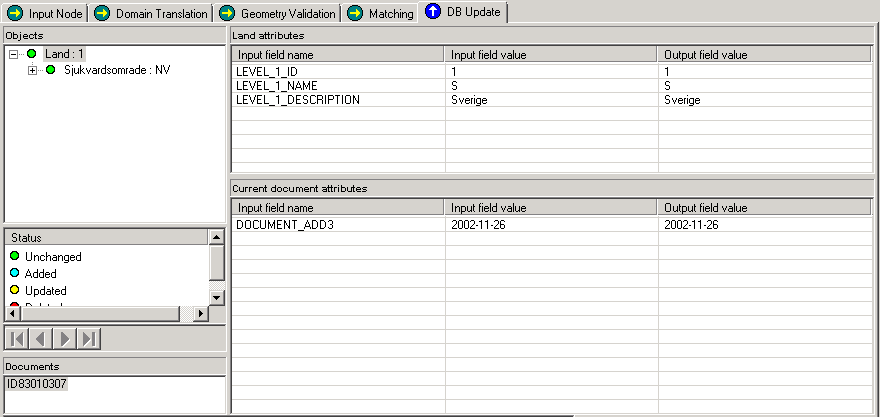
Update node UI, looks like Generic UI, but its functionality is different. This is the last place where we can change attributes of objects before we send it to database. In attributes list we have three columns:
Input field name – attribute name
Input field value – attribute value after processing in TDXM
Output field value – attribute value which will be set in database
